Here I will explain what windows service is, uses of windows service and how to create windows service in c#.
Description:
Today I am writing article to explain about windows services. First we will see what a window service is and uses of windows service and then we will see how to create windows service.
Creating Windows Service is very easy with visual studio just follow the below steps to create windows service
 |
 |
 |
 |
 |
/// /// The main entry point for the application. /// static void Main() { ServiceBase[] ServicesToRun; ServicesToRun = new ServiceBase[] { new ScheduledService() }; ServiceBase.Run(ServicesToRun); } |
using System.IO; using System.Timers; |
protected override void OnStart(string[] args) { } protected override void OnStop() { } |
//Initialize the timer Timer timer = new Timer(); public ScheduledService() { InitializeComponent(); } //This method is used to raise event during start of service protected override void OnStart(string[] args) { //add this line to text file during start of service TraceService("start service"); //handle Elapsed event timer.Elapsed += new ElapsedEventHandler(OnElapsedTime); //This statement is used to set interval to 1 minute (= 60,000 milliseconds) timer.Interval = 60000; //enabling the timer timer.Enabled = true; } //This method is used to stop the service protected override void OnStop() { timer.Enabled = false; TraceService("stopping service"); } private void OnElapsedTime(object source, ElapsedEventArgs e) { TraceService("Another entry at "+DateTime.Now); } private void TraceService(string content) { //set up a filestream FileStream fs = new FileStream(@"d:\ScheduledService.txt",FileMode.OpenOrCreate, FileAccess.Write); //set up a streamwriter for adding text StreamWriter sw = new StreamWriter(fs); //find the end of the underlying filestream sw.BaseStream.Seek(0, SeekOrigin.End); //add the text sw.WriteLine(content); //add the text to the underlying filestream sw.Flush(); //close the writer sw.Close(); } |
Now the service is started, and you will be able to see entries in the log file we defined in the code.
Now open the log file in your folder that Output of the file like this
 |
To build your service project
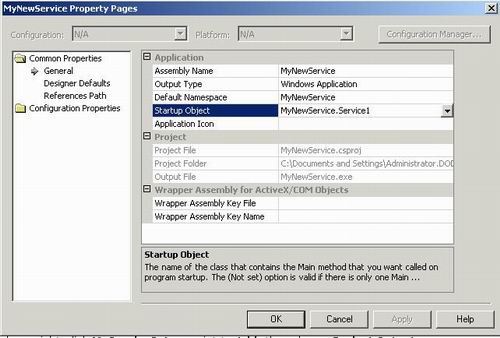
- In Solution Explorer, right-click your project and select Properties from the shortcut menu. The project'sProperty Pages dialog box appears.
- In the left pane, select the General tab in the Common Properties folder.
- From the
Startup objectlist, chooseMyNewService. Click OK. - Press Ctrl+Shift+B to build the project.
Now that the project is built, it can be deployed. A setup project will install the compiled project files and run the installers needed to run the Windows service. To create a complete setup project, you will need to add the projectoutput, MyNewService.exe, to the setup project and then add a custom action to have MyNewService.exe installed.
To create a setup project for your service
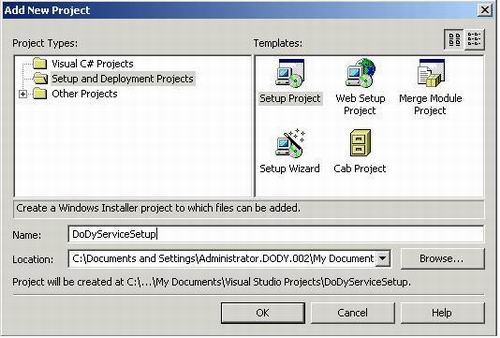
- On the File menu, point to Add Project, and then choose New Project.
- In the Project Types pane, select the Setup and Deployment Projects folder.
- In the Templates pane, select Setup Project. Name the project
MyServiceSetup.
A setup project is added to the solution. Next you will add the output from the Windows service project,MyNewService.exe, to the setup.
To add MyNewService.exe to the setup project
- In Solution Explorer, right-click
MyServiceSetup, point to Add, then choose Project Output. The Add ProjectOutput Group dialog box appears. MyNewServiceis selected in the Project box.- From the list box, select Primary Output, and click OK.
A project item for the primary output of
MyNewServiceis added to the setup project. Now add a custom action to install the MyNewService.exe file.
To add a custom action to the setup project
- In Solution Explorer, right-click the setup project, point to View, then choose Custom Actions. The Custom Actions editor appears.
- In the Custom Actions editor, right-click the Custom Actions node and choose Add Custom Action. The Select Item in Project dialog box appears.
- Double-click the application folder in the list box to open it, select primary output from
MyNewService(Active), and click OK. The primary output is added to all four nodes of the custom actions � Install, Commit, Rollback, and Uninstall. - Build the setup project.
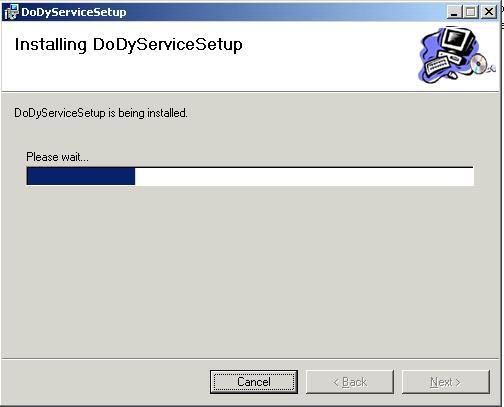
To install the Windows Service
Browse to the directory where the setup project was saved, and run the .msi file to install MyNewService.exe.
To start and stop your service
- Open the Services Control Manager by doing one of the following:
- In Windows 2000 Professional, right-click My Computer on the desktop, then click Manage. In theComputer Management console, expand the Services and Applications node.
- Or -
- In Windows 2000 Server, click Start, point to Programs, click Administrative Tools, and then clickServices.
Note: In Windows NT version 4.0, you can open this dialog box from Control Panel.
- In Windows 2000 Professional, right-click My Computer on the desktop, then click Manage. In theComputer Management console, expand the Services and Applications node.
- You should now see
MyNewServicelisted in the Services section of the window. - Select your service in the list, right-click it, and then click Start.
Right-click the service, and then click Stop.

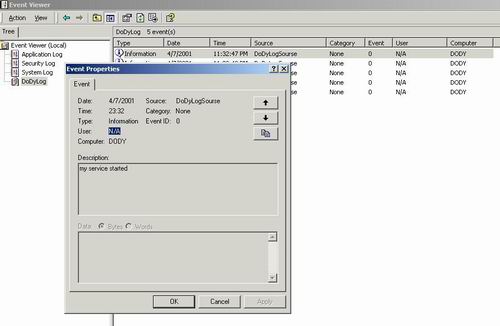
To verify the event log output of your service
- Open Server Explorer and access the Event Logs node. For more information, see Working with Event Logs in Server Explorer.
Note: The Servers node of Server Explorer is not available in the Standard Edition of Visual Basic and Visual C# .NET.
To uninstall your service
- On the Start menu, open Control Panel and click Add/Remove Programs, and then locate your service and clickUninstall.
- You can also uninstall the program by right-clicking the program icon for the .msi file and selecting Uninstall
Another Way Of Installation
how to install window service using command prompt or install/uninstall .NET Window service.
Introduction:
Here I will explain how to install windows service and how to start the windows service in our local machine.
I will explain how to install windows service in our system.
 |
 |
 |
 |
Delete Service
HKEY_LOCAL_MACHINE/SYSTEM/CurrentControlSet/Services |
First select your windows service name and open command prompt here if you using Windows 7 or Vista you’ll need to right-click the command prompt and choose Run as Administrator. We’ll use the sc command to actually do the work.
The syntax used to delete a service is this:
| sc delete ServiceName |
For example to delete service it would be like this
EX: sc delete “WinServiceSample”
 Twitter
 Facebook
 Digg
Digg Delicious
 Stumble


1 comments:
This example is a good one for me to understand the windows service and its step-by-step instructions will helped me a lot. Thanks
Post a Comment